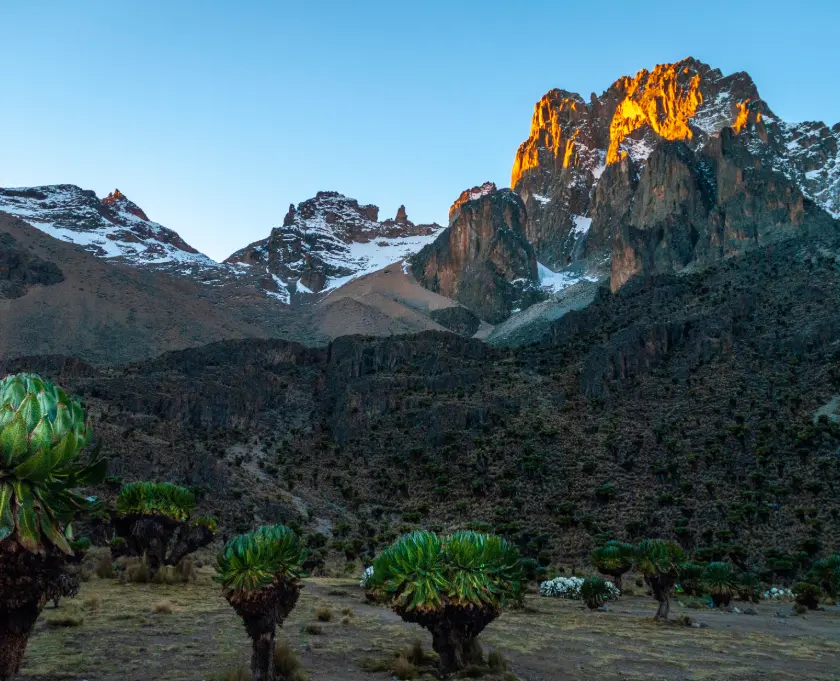
Mount Kenya, Africa’s second-highest peak, isn’t just a physical challenge—it’s a breathtaking journey through diverse ecosystems, from dense rainforests to high-altitude glaciers. While its twin peaks, Batian and Nelion, are technical climbs reserved for expert mountaineers, the third-highest peak, Point Lenana (4,985 m), is a trekking peak accessible to any hiker with the right preparation and mindset.
If you’re dreaming of standing at the top of Mount Kenya, this guide will help you understand what’s involved and how to make your dream a reality.
The Peaks of Mount Kenya
Before you start planning, it’s important to know which peak you’re aiming for.
- Batian (5,199 m) & Nelion (5,188 m): These are the true summits, requiring advanced rock climbing skills, ropes, and specialized gear. They are only for experienced technical climbers.
- Point Lenana (4,985 m): This is the trekking summit. It’s a challenging hike but requires no technical climbing skills, making it the goal for most trekkers.
Choosing Your Route
There are three main routes to Point Lenana, each offering a unique experience. Your choice will depend on your fitness level, the time you have, and the type of scenery you want to see.
- Sirimon Route (The Easiest & Most Popular): This is the most recommended route, especially for first-time trekkers. It has a very gradual ascent, which is excellent for acclimatization. The scenery is stunning, with open grasslands and views of the main peaks almost from the start.
- Duration: Typically 4-5 days.
- Best for: Hikers of all fitness levels.
- Chogoria Route (The Most Scenic): Known for its dramatic landscapes, including sheer cliffs, beautiful gorges, and pristine alpine lakes like Lake Michaelson. The Chogoria route is considered the most beautiful ascent but is slightly more challenging due to its length.
- Duration: Typically 5-6 days.
- Best for: Those who prioritize stunning scenery and have a bit more time.
- Naro Moru Route (The Fastest & Most Direct): This is the shortest and steepest route to the summit. It’s often muddy and has a notorious section known as the “Vertical Bog.” While it can be done in 3-4 days, the rapid ascent increases the risk of altitude sickness.
- Duration: Typically 3-4 days.
- Best for: Experienced hikers short on time.
For the ultimate experience, many trekkers choose a Sirimon-Chogoria Traverse, ascending via Sirimon and descending via the beautiful Chogoria route.
When to Go: The Best Time to Climb
The best time to climb Mount Kenya is during the dry seasons.
- January-February: The driest and warmest months. This is an excellent time for clear skies and easy trail conditions.
- July-October: The other dry season. It’s cooler, but the weather is generally stable, offering great visibility.
It’s best to avoid the long rains in April-May and the short rains in November-December, as the trails become very muddy, and visibility is often poor.
Altitude & Safety: The Number One Priority
Altitude sickness is a real risk on Mount Kenya. The best way to prevent it is to ascend slowly.
- Acclimatization: Choose a longer itinerary (5+ days) to give your body time to adjust.
- Hydration: Drink 4-6 liters of water per day. Staying hydrated is critical at altitude.
- Listen to your body: Don’t ignore symptoms like headaches, nausea, or dizziness. If symptoms persist, descend immediately.
- Go with a Guide: By law, you must be accompanied by a Kenya Wildlife Service-approved guide. They are not only for navigation and safety but are also trained to spot the signs of altitude sickness.
What to Pack
Your packing list will be similar to any high-altitude trek. Remember the three-layer system: a moisture-wicking base layer, a warm insulating mid-layer (like fleece or down), and a waterproof/windproof shell.
- Essential Gear:
- Good quality hiking boots (broken in!)
- A warm sleeping bag (rated for at least −15∘C)
- Headlamp and extra batteries
- Trekking poles for stability
- Water bottles or a hydration bladder
- High-energy snacks
- Sunscreen and a wide-brimmed hat
- Warm gloves, a hat, and a buff